
Temple Throwdown
- Requirement: During the Atlantean Temple portion of the Story Mission (Normal), in a single run, defeat at least 30 enemies that emerge from the moonpools
- Feat reward: 25 Points
- Source reward tier: 2 Stars
- Difficulty estimate: 2/5 (Routine) - Provisional estimate from the stated objective; effort depends on gear, group and availability. No completion time has been measured.
- Completion plan: Confirm completion in the in-game Feats menu. This planning advice is inferred from the requirement; it is not a verified encounter walkthrough.
- Attempt order: Read the objective before travelling. No additional preparation constraint was identified from the source text. These are planning flags, not verified completion times.
Tentacle Tamer
- Requirement: During the Starro: The Threat Below Raid (Elite), defeat Starro controlled Aquaman only after trouncing at least 10 of the largest Squid Tentacles he summons during one attempt of the fight
- Feat reward: 10 Points
- Source reward tier: 1 Star
- Difficulty estimate: 4/5 (Hard) - Elite encounter or later Survival round raises the execution and group requirements. Group coordination or an opposing player adds variability.
- Completion plan: Before entering, agree on the feat conditions with your group and use the exact instance variant named in the requirement.
- Completion plan: Confirm completion in the in-game Feats menu. This planning advice is inferred from the requirement; it is not a verified encounter walkthrough.
- Attempt order: Coordinate the instance attempt. Group / instance conditions These are planning flags, not verified completion times.
Vent Prevention
- Requirement: During the Starro: The Threat Below Raid (Elite), defeat the Conqueror without allowing it to further empower itself with any of the steam vents during one attempt
- Feat reward: 10 Points
- Source reward tier: 1 Star
- Difficulty estimate: 4/5 (Hard) - Elite encounter or later Survival round raises the execution and group requirements. Group coordination or an opposing player adds variability.
- Completion plan: Before entering, agree on the feat conditions with your group and use the exact instance variant named in the requirement.
- Completion plan: Treat the stated failure condition as mandatory for the whole attempt; check with the group before continuing after a mistake.
- Completion plan: Confirm completion in the in-game Feats menu. This planning advice is inferred from the requirement; it is not a verified encounter walkthrough.
- Attempt order: Coordinate the instance attempt. Group / instance conditions; Read failure / timer conditions before starting These are planning flags, not verified completion times.
Where's Starro?
- Requirement: In Central City Starro Deluge Zone, find and destroy the fallen Starro spores that are being ejected from the giant Starro flying above Central City
- Feat reward: 10 Points
- Source reward tier: 1 Star
- Difficulty estimate: 2/5 (Routine) - Provisional estimate from the stated objective; effort depends on gear, group and availability. No completion time has been measured.
- Completion plan: Confirm completion in the in-game Feats menu. This planning advice is inferred from the requirement; it is not a verified encounter walkthrough.
- Attempt order: Read the objective before travelling. No additional preparation constraint was identified from the source text. These are planning flags, not verified completion times.
Wranglin' Penguins
- Requirement: During the Starro: Spreading Spores Duo, in the Iceberg Lounge, defeat the final boss only after destroying 7 Exploding Pengbots before they blow themselves up in a single run
- Feat reward: 10 Points
- Source reward tier: 1 Star
- Difficulty estimate: 2/5 (Routine) - Provisional estimate from the stated objective; effort depends on gear, group and availability. No completion time has been measured.
- Completion plan: Before entering, agree on the feat conditions with your group and use the exact instance variant named in the requirement.
- Completion plan: Confirm completion in the in-game Feats menu. This planning advice is inferred from the requirement; it is not a verified encounter walkthrough.
- Attempt order: Coordinate the instance attempt. Group / instance conditions These are planning flags, not verified completion times.
Aquatic Assassin
- Requirement: Collect all styles in the Mera set. Completing this feat will grant you a cost reduction on the Head, Chest, Shoulders, Legs, Hands, Feet, Back, and Waist items from the Equipment Supplier Starro
- Feat reward: 50 Points
- Source reward tier: 3 Stars
- Difficulty estimate: 2/5 (Routine) - Collection completion depends on obtaining all required pieces.
- Completion plan: Track the named pieces in the feat menu before spending currency or collecting duplicates. Follow the source item links for the exact collection or style set.
- Completion plan: Confirm completion in the in-game Feats menu. This planning advice is inferred from the requirement; it is not a verified encounter walkthrough.
- Attempt order: Prepare items and currency first. Items / currency preparation These are planning flags, not verified completion times.
Hey Now, You're an All-Star
- Requirement: Collect all styles in the Enhanced Conqueror set. Grants you a 10% damage bonus in the following areas - Starro: Invasion!, Starro: Spreading Spores, Starro: The Threat Below, Starro: The Threat Below (Raid), or Central City Starro Deluge Zone ; Grants title: The Invulnerable
- Feat reward: n/a
- Source reward tier: n/a
- Difficulty estimate: 3/5 (Demanding) - Group coordination or an opposing player adds variability. Collection completion depends on obtaining all required pieces.
- Completion plan: Before entering, agree on the feat conditions with your group and use the exact instance variant named in the requirement.
- Completion plan: Track the named pieces in the feat menu before spending currency or collecting duplicates. Follow the source item links for the exact collection or style set.
- Completion plan: Confirm completion in the in-game Feats menu. This planning advice is inferred from the requirement; it is not a verified encounter walkthrough.
- Attempt order: Prepare items and currency first. Items / currency preparation; Group / instance conditions These are planning flags, not verified completion times.
Source wiki detail links (7)
Feat requirement and reward · Enhanced Conqueror · Starro: Invasion! · Starro: Spreading Spores · Starro: The Threat Below · Central City Starro Deluge Zone · titleIt's Conquering Time
- Requirement: Collect all styles in the Conqueror set ; Grants title: the Invader
- Feat reward: 50 Points
- Source reward tier: 3 Stars
- Difficulty estimate: 2/5 (Routine) - Collection completion depends on obtaining all required pieces.
- Completion plan: Track the named pieces in the feat menu before spending currency or collecting duplicates. Follow the source item links for the exact collection or style set.
- Completion plan: Confirm completion in the in-game Feats menu. This planning advice is inferred from the requirement; it is not a verified encounter walkthrough.
- Source guidance: Grants title: the Invader
- Source guidance: Historical item checklist; confirm the current required pieces in the in-game Feats menu.
- Attempt order: Prepare items and currency first. Items / currency preparation These are planning flags, not verified completion times.


Marine Royalty
- Requirement: Collect all styles in the Enhanced Mera set. Completing this feat will grant you a cost reduction on the Head, Chest, Shoulders, Legs, Hands, Feet, Back, and Waist items from the Equipment Supplier Starro
- Feat reward: 50 Points
- Source reward tier: 3 Stars
- Difficulty estimate: 2/5 (Routine) - Collection completion depends on obtaining all required pieces.
- Completion plan: Track the named pieces in the feat menu before spending currency or collecting duplicates. Follow the source item links for the exact collection or style set.
- Completion plan: Confirm completion in the in-game Feats menu. This planning advice is inferred from the requirement; it is not a verified encounter walkthrough.
- Attempt order: Prepare items and currency first. Items / currency preparation These are planning flags, not verified completion times.
Deep-Sea Diver
- Requirement: Collect all styles in the Spindrift Set. Completing this feat will grant you a cost reduction on the Head, Chest, Shoulders, Legs, Hands, Feet, Back, and Waist items from the Equipment Supplier Starro
- Feat reward: 50 Points
- Source reward tier: 3 Stars
- Difficulty estimate: 2/5 (Routine) - Collection completion depends on obtaining all required pieces.
- Completion plan: Track the named pieces in the feat menu before spending currency or collecting duplicates. Follow the source item links for the exact collection or style set.
- Completion plan: Confirm completion in the in-game Feats menu. This planning advice is inferred from the requirement; it is not a verified encounter walkthrough.
- Attempt order: Prepare items and currency first. Items / currency preparation These are planning flags, not verified completion times.
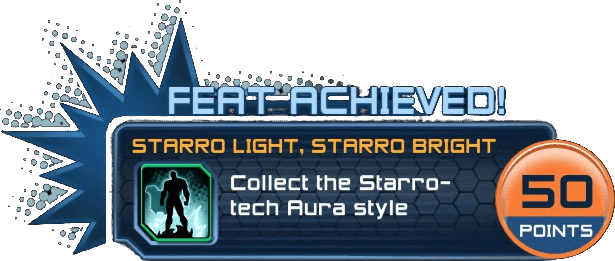
Starro Light, Starro Bright
- Requirement: Collect the Starro-tech Aura style
- Feat reward: 50 Points
- Source reward tier: 3 Stars
- Difficulty estimate: 2/5 (Routine) - Provisional estimate from the stated objective; effort depends on gear, group and availability. No completion time has been measured.
- Completion plan: Track the named pieces in the feat menu before spending currency or collecting duplicates. Follow the source item links for the exact collection or style set.
- Completion plan: Confirm completion in the in-game Feats menu. This planning advice is inferred from the requirement; it is not a verified encounter walkthrough.
- Source guidance: Historical item checklist; confirm the current required pieces in the in-game Feats menu.
- Attempt order: Prepare items and currency first. Items / currency preparation These are planning flags, not verified completion times.

Starro Spangled
- Requirement: Collect all styles in the Asteroidea set
- Feat reward: 10 Points
- Source reward tier: 1 Star
- Difficulty estimate: 2/5 (Routine) - Collection completion depends on obtaining all required pieces.
- Completion plan: Track the named pieces in the feat menu before spending currency or collecting duplicates. Follow the source item links for the exact collection or style set.
- Completion plan: Confirm completion in the in-game Feats menu. This planning advice is inferred from the requirement; it is not a verified encounter walkthrough.
- Source guidance: Historical item checklist; confirm the current required pieces in the in-game Feats menu.
- Attempt order: Prepare items and currency first. Items / currency preparation These are planning flags, not verified completion times.


Starro: Covenant
- Requirement: Collect the Starro Spore Aura style
- Feat reward: 50 Points
- Source reward tier: 3 Stars
- Difficulty estimate: 2/5 (Routine) - Provisional estimate from the stated objective; effort depends on gear, group and availability. No completion time has been measured.
- Completion plan: Track the named pieces in the feat menu before spending currency or collecting duplicates. Follow the source item links for the exact collection or style set.
- Completion plan: Confirm completion in the in-game Feats menu. This planning advice is inferred from the requirement; it is not a verified encounter walkthrough.
- Attempt order: Prepare items and currency first. Items / currency preparation These are planning flags, not verified completion times.
Undersea Explorer
- Requirement: Collect all styles in the Enhanced Spindrift set
- Feat reward: 50 Points
- Source reward tier: 3 Stars
- Difficulty estimate: 2/5 (Routine) - Collection completion depends on obtaining all required pieces.
- Completion plan: Track the named pieces in the feat menu before spending currency or collecting duplicates. Follow the source item links for the exact collection or style set.
- Completion plan: Confirm completion in the in-game Feats menu. This planning advice is inferred from the requirement; it is not a verified encounter walkthrough.
- Source guidance: Historical item checklist; confirm the current required pieces in the in-game Feats menu.
- Attempt order: Prepare items and currency first. Items / currency preparation These are planning flags, not verified completion times.
Source wiki detail links (3)
Feat requirement and reward · Enhanced Spindrift · Source item checklistWhatsits Galore
- Requirement: Collect one of the following auras: Rainbow Current Aura, White Solar Aura, or Urchin Aura
- Feat reward: 25 Points
- Source reward tier: 2 Stars
- Difficulty estimate: 1/5 (Simple) - A single basic action with no additional timing or group condition stated.
- Completion plan: Track the named pieces in the feat menu before spending currency or collecting duplicates. Follow the source item links for the exact collection or style set.
- Completion plan: Confirm completion in the in-game Feats menu. This planning advice is inferred from the requirement; it is not a verified encounter walkthrough.
- Source guidance: Historical item checklist; confirm the current required pieces in the in-game Feats menu.
- Attempt order: Prepare items and currency first. Items / currency preparation These are planning flags, not verified completion times.
Source wiki detail links (5)
Feat requirement and reward · Rainbow Current Aura · White Solar Aura · Urchin Aura · Source item checklistStarro Biotechnical Operations Director
- Requirement: Collect all Base Items from the 2017 Starro the Conqueror Event ; Atlantean Table - Metal; Atlantean Table - Stone; Hydrothermal Vent; Starro Dissection - Test A180; Starro Dissection - Test A203; Starro Dissection - Test A331; Starro Dissection - Test A450; Starro Dissection - Test A582; Starro Dissection - Test A605; Starro Hatchery; Starro Heat Experiment - Test H019; Starro Heat Experiment - Test H143; Starro Specimen - ST-1; Starro Specimen - ST-2; Starro Tooth Specimen; Starro Stretch Experiment - Test S14; Starro Stretch Experiment - Test S19
- Feat reward: 50 Points
- Source reward tier: 3 Stars
- Difficulty estimate: 2/5 (Routine) - Provisional estimate from the stated objective; effort depends on gear, group and availability. No completion time has been measured.
- Completion plan: Track the named pieces in the feat menu before spending currency or collecting duplicates. Follow the source item links for the exact collection or style set.
- Completion plan: Confirm completion in the in-game Feats menu. This planning advice is inferred from the requirement; it is not a verified encounter walkthrough.
- Source guidance: Atlantean Table - Metal
- Source guidance: Atlantean Table - Stone
- Source guidance: Hydrothermal Vent
- Source guidance: Starro Dissection - Test A180
- Source guidance: Starro Dissection - Test A203
- Source guidance: Starro Dissection - Test A331
- Source guidance: Starro Dissection - Test A450
- Source guidance: Starro Dissection - Test A582
- Source guidance: Starro Dissection - Test A605
- Source guidance: Starro Hatchery
- Source guidance: Starro Heat Experiment - Test H019
- Source guidance: Starro Heat Experiment - Test H143
- Source guidance: Starro Specimen - ST-1
- Source guidance: Starro Specimen - ST-2
- Source guidance: Starro Tooth Specimen
- Source guidance: Starro Stretch Experiment - Test S14
- Source guidance: Starro Stretch Experiment - Test S19
- Source guidance: Historical item checklist; confirm the current required pieces in the in-game Feats menu.
- Attempt order: Prepare items and currency first. Items / currency preparation These are planning flags, not verified completion times.
Source wiki detail links (19)
Feat requirement and reward · Atlantean Table - Metal · Atlantean Table - Stone · Hydrothermal Vent · Starro Dissection - Test A180 · Starro Dissection - Test A203 · Starro Dissection - Test A331 · Starro Dissection - Test A450 · Starro Dissection - Test A582 · Starro Dissection - Test A605 · Starro Hatchery · Starro Heat Experiment - Test H019 · Starro Heat Experiment - Test H143 · Starro Specimen - ST-1 · Starro Specimen - ST-2 · Starro Tooth Specimen · Starro Stretch Experiment - Test S14 · Starro Stretch Experiment - Test S19 · Source item checklistStarro Lab Technician
- Requirement: Collect 12 Base Items from the Starro the Conqueror Event
- Feat reward: 25 Points
- Source reward tier: 2 Stars
- Difficulty estimate: 2/5 (Routine) - Provisional estimate from the stated objective; effort depends on gear, group and availability. No completion time has been measured.
- Completion plan: Track the named pieces in the feat menu before spending currency or collecting duplicates. Follow the source item links for the exact collection or style set.
- Completion plan: Confirm completion in the in-game Feats menu. This planning advice is inferred from the requirement; it is not a verified encounter walkthrough.
- Source guidance: Historical item checklist; confirm the current required pieces in the in-game Feats menu.
- Attempt order: Prepare items and currency first. Items / currency preparation These are planning flags, not verified completion times.
Starro Research Assistant
- Requirement: Collect 6 Base Items from the Starro the Conqueror Event
- Feat reward: 10 Points
- Source reward tier: 1 Star
- Difficulty estimate: 2/5 (Routine) - Provisional estimate from the stated objective; effort depends on gear, group and availability. No completion time has been measured.
- Completion plan: Track the named pieces in the feat menu before spending currency or collecting duplicates. Follow the source item links for the exact collection or style set.
- Completion plan: Confirm completion in the in-game Feats menu. This planning advice is inferred from the requirement; it is not a verified encounter walkthrough.
- Source guidance: Historical item checklist; confirm the current required pieces in the in-game Feats menu.
- Attempt order: Prepare items and currency first. Items / currency preparation These are planning flags, not verified completion times.