Overview
- Starro: Invasion! is a 4-player alert in the Deluge episode.
- Access to the instance requires a combat rating of 210 for Normal difficulty or Level 15+ for Casual. The alert rewards 5 Source Marks.
- The alert actually takes places in different locations one of which is chosen randomly.

Story
- Starro has taken control of heroes and villains alike, and is forcing them to do his bidding. Put a stop to Starro by rescuing those under its influence.
- JSA Headquarters
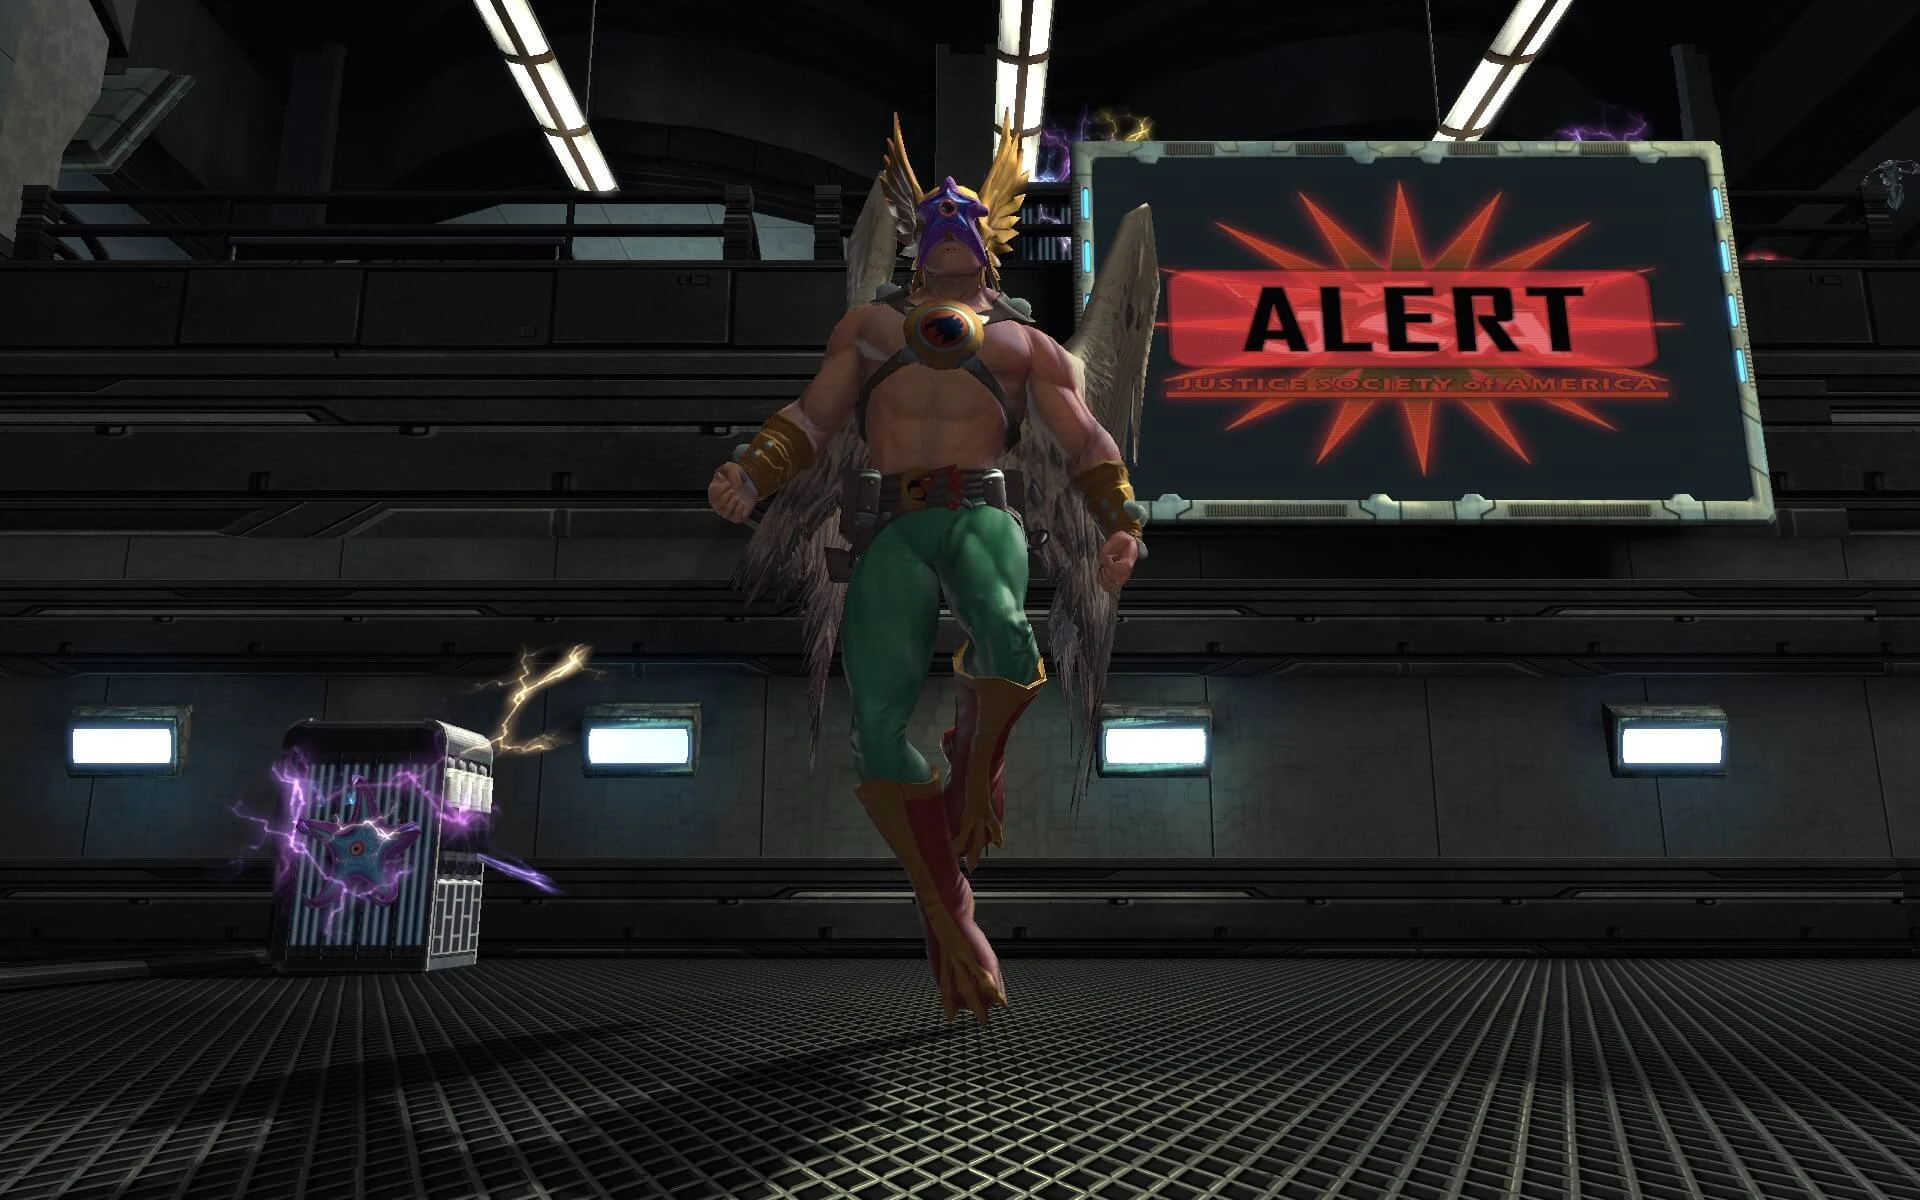
- The Justice Society of America is not responding to distress calls[1]. When the exobyte heroes/villains arrive in the JSA Headquarters, the place was taken by Starro, and members of the JSA are under their control. They fight the alien starfish and teleport Alan Scott, Black Canary, Hawkman, Power Girl, and Wildcat to a S.T.A.R./ LexCorp Lab to have the spores removed from their faces.
- STAR Labs Research Facility
- The STAR Labs Facility in Little Bohemia has been taken by Starro. The exobyte heroes/villains make their way through the mind-controlled STAR troops and Starros, until they get the attention of a STAR-associated iconic who is under Starro's control. While trying not to lose their mind to Starro themselves, they fight and subdue Cyborg, Martian Manhunter, Professor Zoom, Superman, and Supergirl, teleporting them to a S.T.A.R./ LexCorp Lab to have the spores removed from their faces.
- Xanadu's Magic Shop
- The exobyte heroes/villains arrive at Madame Xanadu's shop, which is populated by Starro-controlled Sentinels of Magic and cultists from the Cult of Trigon, almost as if Starro has interrupted some sort of conflict between the two factions. The group ventures through the shop defeating the controlled mobs as well as Starros, all the way down to the basement. There they face powerful magic users: Brother Blood, Donna Troy, Felix Faust, Solomon Grundy, and Zatanna. Victorious, they send them to a S.T.A.R./ LexCorp Lab to have the spores removed from their faces.
Related article links (8)
Justice Society of America · [1] · Starro · S.T.A.R. · LexCorp · Little Bohemia · Sentinels of Magic · Cult of TrigonCharacters
- JSA Headquarters
- Controlled Alan Scott
- Controlled Black Canary
- Controlled Hawkman
- Controlled Power Girl
- Controlled Wildcat
- JSA Security
- Enhanced Security Mech
- Security Bot
- Security Drone
- Security Mech
- StarroForces
- Callow Starro
- Ordinary Starro
- Powerful Starro
- Starro Mender
- Starro Sapper
- Starro Spitter
- Janitor
- Skeets Repairs
- Madame Xanadu's Magic Shop
- Controlled Brother Blood
- Controlled Donna Troy
- Controlled Felix Faust
- Controlled Solomon Grundy
- Controlled Zatanna
- Cult of Trigon
- Controlled Blood Arcanum
- Controlled Blood Cultist
- Controlled Blood Cultist Deadeye
- Controlled Blood Priest Mender
- Sentinels of Magic
- Controlled Disciple
- Controlled Herald
- Controlled Preserver
- Controlled Warder
- StarroForces
- Callow Starro
- Ordinary Starro
- Ordinary Starro Splitter
- Powerful Starro
- Powerful Starro Splitter
- Starro Mender
- Starro Spitter
- Skeets Repairs
- STAR Labs Research Facility
- Controlled Cyborg
- Controlled Martian Manhunter
- Controlled Professor Zoom
- Controlled Supergirl
- Controlled Superman
- S.T.A.R. Labs
- Controlled STAR Labs Lieutenant
- Controlled STAR Labs Officer
- StarroForces
- Ordinary Starro
- Powerful Starro
- Starro Mender
- Starro Spitter
- Skeets Repairs
- The enemy combat rating is 235 for the episode and 220 for the accompanying event.
Related article links (44)
JSA Headquarters · Controlled Alan Scott · Controlled Black Canary · Controlled Hawkman · Controlled Power Girl · Controlled Wildcat · Enhanced Security Mech · Security Bot · Security Drone · Security Mech · Starro · Callow Starro · Ordinary Starro · Powerful Starro · Starro Sapper · Skeets Repairs · Madame Xanadu's Magic Shop · Controlled Brother Blood · Controlled Donna Troy · Controlled Felix Faust · Controlled Solomon Grundy · Controlled Zatanna · Cult of Trigon · Controlled Blood Arcanum · Controlled Blood Cultist · Controlled Blood Cultist Deadeye · Controlled Blood Priest Mender · Sentinels of Magic · Controlled Disciple · Controlled Herald · Controlled Preserver · Controlled Warder · Ordinary Starro Splitter · Powerful Starro Splitter · STAR Labs Research Facility · Controlled Cyborg · Controlled Martian Manhunter · Controlled Professor Zoom · Controlled Supergirl · Controlled Superman · S.T.A.R. Labs · Controlled STAR Labs Lieutenant · Controlled STAR Labs Officer · combat ratingWalkthrough
- In every location, you should defeat all of the enemies to get access to open the door to the next area, then clean the final room so the controlled iconic will appear. Have in mind that the mobs in this instance hit harder than the ones in most alerts - it is recommended to use a strong shield or have at least a tank or healer on your group.
- The Starro mob is found in all scenarios. They come in the varieties Ordinary, Powerful, Mender, and Spitter. Ordinary Starros are the smallest and weakest of them, they use only Hand Blast attacks, while the others are larger and use Starro Beam. Powerful Starros deal more damage, Starro Menders are healers able to heal themselves and nearby allies. It is possible to not get all of them in a run. Starro Spitters are controllers that will attempt to knock down and stun.
- For the controlled iconics, they have most of the movements you'd be familiar with from previous instances and bounties, plus Starro Beam. Upon defeating the iconic, interact with them to end the run. A chest will appear near where the boss spawned with additional rewards from the original Starro the Conqueror event, and one of the players must interact with them so the group can collect the treasure box.
- Be aware that every scenario has its own specificities.
JSA Headquarters Scenario
- JSA Security is the special mob for this scenario. There are 4 types, but you only have to be aware of the Enhanced Security Mechs, as they are much more powerful than the others, with powerful abilities such as Flame Field, Flame Cascade, and Flame Burst - hold block or back away when he starts spinning to avoid massive damage. Once you clean the enemies in the first area, you'll to the next room. While you clean the rest of the mobs, pay attention to the Starros feeding on the energy from the mainframes in the room - they're Starro Sappers and will play a part in boss fight.
- Fighting the JSA
- Some time after you've engaged the boss, a couple of Starro Sappers will start a countdown. If you don't destroy them, they'll grow up into full Starros and attack you - the bigger the mainframe, the more powerful the Starro (from Callow, to Ordinary, to Powerful) - and they will accumulate if ignored. This mechanic is similar to the one from the fight with in the CCPD station in Stemming the Tide.
- Controlled Alan Scott is a little tricky. At first, you would think just using a regular Two-Handed weapon, but the combat log will tell you his damage is caused by "Light Construct: Hammer," which implies it is closest to the Construct Combos from the Light powerset than to mere weapon. He hits hard, and a melee tactic will be risky if you don't have enough health and/or defense, or a shield strong enough to resist his blows.
Related article links (7)
Enhanced Security Mechs · Flame Cascade · Stemming the Tide · Controlled Alan Scott · Two-Handed · Construct Combos · LightMadame Xanadu's Magic Shop Scenario
- Controlled Sentinels of Magic (yellow) and Controlled Blood Cultist (red) are the special mob for this scenario. They come in a few varieties, but Warder, Blood Arcanum, Blood Priest Mender, and Blood Cultist Deadeye are the strongest. Most of them attack with wands, while Menders use Hand Blast and Deadeyes use bows. Most of the attacks are vulnerable to interrupt or to block - use movements and abilities that interrupt (such as lunge) or imobilize them if you have enough dominance. Menders can heal themselves.
- Once you have cleaned the final room, one of the following magic user bosses will appear: Controlled Brother Blood, Controlled Donna Troy, Controlled Felix Faust, Controlled Solomon Grundy, or Controlled Zatanna.
- Magic Shop Bosses
- During the boss fight, the magical energy will attract special Starros. Defeating a Powerful Starro Splitter will turn it into 2 Ordinary Starro Splitter; defeating a Ordinary Starro Splitter will turn it into 2 Callow Starros. They'll go to where the battle is, and will accumulate if ignored. Tanks or controllers can help with dealing with the crowd.
- Controlled Brother Blood fights with Hand Blast attacks. As you're fighting a weapon user, understanding the dynamics of combat is important to successfully counter and to avoid being countered.
- Controlled Zatanna is a strong opponent. She uses flight and a wand that throws Hand Blast attacks when in range and One-Handed attacks in melee. She especializes in ranged attacks that cause high damage. It is recommended to use shields and block.
Related article links (8)
Hand Blast · bows · vulnerable to interrupt or to block · dominance · Controlled Brother Blood · Controlled Zatanna · flight · One-HandedSTAR Labs Research Facility Scenario
- Controlled STAR Labs troops are the special mob for this scenario. There are 2 types: Officer and Lieutenant. The Officer is weaker and uses simple rifle attacks, while the Lieutenant has more health and uses only the "Rifle Shot" attack, a beam that deals significant damage, but is vulnerable to interrupt - use movements and abilities that interrupt (such as lunge) or imobilize them if you have enough dominance.
- Once you have cleaned the final room, the floor will be covered with Starro Spores (tiny versions of Starro that can't be attacked) and one of the following STAR Labs related bosses will appear: Controlled Superman, Controlled Cyborg, Controlled Supergirl, Controlled Professor Zoom, or Controlled Martian Manhunter.
- Starro Spores
- During the boss fight, avoid getting in contact with the spores, as those will make your character mind-controlled - your teammates can reverse that by using a Quicklime Canister near you (this mechanic appears again in the raid Starro: The Threat Below. There are four consoles in the room which can be used and which will clean an area around them of those Starro (below the boss's platform, by the healing barrel to the West, then across the room from this one, and another up under the northernmost of the platforms), but the platform where the iconic boss spawns on cannot be cleaned (if you can fly, you don't have to worry about them unless you're pulled down by the boss or your mind-controlled teammate). When you activate a console, you'll hear the message "Cryogenic fire suppression system initiated. Sub-zero gas activated." If get in the way of the gas, it will stun you, and you'll have to use breakout to escape. Each console can only be used once per fight.
- STAR Lab Bosses
- Controlled Professor Zoom uses Super Speed and Martial Arts, including attacks that will pull and knock back, throwing you across the room. He makes it harder to avoid the Spores. Use lunge and block to keep him in check (tanks might use their Group Breakout abilities).
- Controlled Superman uses Flight and Brawling. He retains Cold Breath and Freezing Breath, but he doesn't use Heat Vision (probably due to the starfish on his face). Fighting him in the air is the easiest option if you have quick reflexes to avoid falling on one of the spores below.
Related article links (13)
rifle · vulnerable to interrupt · dominance · Quicklime Canister · Starro: The Threat Below · Controlled Professor Zoom · Super Speed · Martial Arts · Group Breakout · Controlled Superman · Flight · Brawling · Freezing BreathRewards
- 4850 Cash
- Source Marks
- 300 Prestige Points
- Event related gear
- Chance for event related R&D Component
- Deluge: Treasure Box



Headlines
- Starro Stooge Smackdown
- Heroes and villains alike are being controlled by intergalactic enemy of Earth: Starro. But Exobyte-empowered meta-humans are fighting back!
- It can also be obtained from Starro: Spreading Spores
Collections
- Fallen Stars
- Starro the Conqueror: Loot BoxSpace to Face
- Starro the Conqueror: Loot Box
- Starro Wars
- Starro the Conqueror: Loot BoxUnlucky Stars
- Starro the Conqueror: Loot Box
Related article links (5)
Fallen Stars · Starro the Conqueror: Loot Box · Space to Face · Starro Wars · Unlucky StarsFeats
- See also: Deluge Feats
- Everyone's a Star: During the Starro: Invasion! Alert, defeat (25 Points + Absolute Star title):; Controlled Superman; Controlled Cyborg; Controlled Supergirl; Controlled Professor Zoom; Controlled Martian Manhunter; Controlled Brother Blood; Controlled Solomon Grundy; Controlled Donna Troy; Controlled Felix Faust; Controlled Zatanna; Controlled Hawkman; Controlled Power Girl; Controlled Alan Scott; Controlled Wildcat; Controlled Black Canary
- Spore'd: Complete each of the Starro: Spreading Spores Duos and Starro: Invasion! Alerts (10 Points); Science Spire (Duo); Sentinels of Magic Base (Duo); Steelworks (Duo); STAR Labs Research Facility (Alert); JSA Headquarters (Alert); Xanadu's Magic Shop (Alert); Iceberg Lounge (Duo)
Related article links (19)
Deluge Feats · title · Controlled Superman · Controlled Cyborg · Controlled Supergirl · Controlled Professor Zoom · Controlled Martian Manhunter · Controlled Brother Blood · Controlled Solomon Grundy · Controlled Donna Troy · Controlled Felix Faust · Controlled Zatanna · Controlled Hawkman · Controlled Power Girl · Controlled Alan Scott · Controlled Wildcat · Controlled Black Canary · Spore'd · Starro: Spreading SporesTrivia
- The alert originally was released for the Starro the Conqueror event in 2017.
- For the Deluge episode Controlled Professor Zoom replaced Controlled Flash.
- In the STAR Labs scenario, if you're mind-controlled while fighting the boss on your own, the boss will stop attacking you and you'll no longe be in combat mode. The battle resumes in the instant the controlled effect expires.
Related article links (4)
Starro the Conqueror · Deluge · Controlled Professor Zoom · Controlled FlashGallery