
Overview
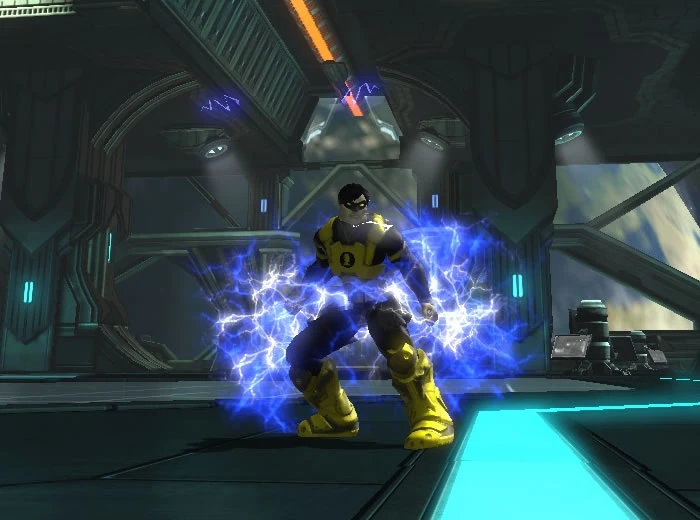
- Healers are one of the basic roles available in DCUO. This role generally focuses on keeping the team alive by healing other group members and preventing damage with group shields. Healers have the ability to heal and buff their team mates with high levels of restoration. All healing powers specialize in different healing methods and it is therefore preferred that Raids and Operations have two different healing powers. The symbol that represents a healer is a Heart.


Role
- In order to acquire the Healing Role, you must select Nature, Sorcery, Electricity, Celestial or Water as your power set. Once you reach level 10, you will automatically acquire the Healing Role. In the Healing role, Restoration is increased by 35%.
- Starting at level 10, a player is allowed to spend skill points in multiple weapon skill trees.
Mail Messages
- Upon reaching level 10, players receive a message from Oracle or Calculator, accessible from any mail terminal.
- Heroes:
- Villains:
Mail Messages
Related article links (1)
Healer's Band of Energy| From: Oracle |
|---|
| " Ready to keep your allies spellbound? Be the life of the party - in your new Healing Role! It boosts your healing abilities and reduces your damage output. Check out the descriptions in the the Traits tab of you Communicator for more on role Bonuses. Plus, if the action gets too heated, you can always switch roles out of combat by using the up button (T on the keyboard)." |
| Attachment: Healer's Band of Energy |
Mail Messages
Related article links (1)
Healer's Band of Energy| From: Calculator |
|---|
| " You've been draining life force from your foes. Now it's time to give life to your allies in your new Healing Role. It boots your healing abilities and reduces your damage output. Check out the descriptions in the the Traits tab of you Communicator for more on role Bonuses. Plus, if the action gets too heated, you can always switch roles out of combat by using the up button (T on the keyboard)." |
| Attachment: Healer's Band of Energy |
Stats
- In order of importance for stats are:
- Restoration
- Critical Healing Chance
- Critical Healing Magnitude
- Dominance
- Health
- Power
Related article links (7)
stats · Restoration · Critical Healing Chance · Critical Healing Magnitude · Dominance · Health · PowerRestoration
- Restoration is combined with Dominance to determine the potency of healing and shield abilities.
- Healing = Base Healing Multiplier * (30% Restoration + 25% Dominance).
- Shield = Base Shield Multiplier * (112.5% Restoration + 150% Dominance)
Critical Healing Chance
- Critical Healing Chance is the chance that a heal will critically hit.
- Base Critical Heal Chance is 5%.
Critical Healing Magnitude
- Critical Healing Magnitude is the bonus percent healing of a critical heal.
- Base Critical Healing Magnitude is 25%.
Dominance
- Dominance is combined with Restoration to determine the potency of healing and shield abilities.
- At high levels, Dominance must be higher than enemy Willpower for crowd control effects to be effective.
- Healing = Base Healing Multiplier * (30% Restoration + 25% Dominance).
- Shield = Base Shield Multiplier * (112.5% Restoration + 150% Dominance)
Health
- Health measures the ability to withstand knockout.
- While out of combat, you regenerate a percentage of your max Health every second.
Power
- Power is required to use abilities in your Loadout and is drained as they are performed.
- You passively regenerate a percentage of your max Power every second.
- Power regeneration is increased out of combat.
Priority Heal Powers
- Each Healer power set has a Priority Heal that targets the group member with the lowest Health.
- A Priority Heal will also heal the caster.
Related article links (0)
Priority Heal Powers
Related article links (14)
Celestial · Renew · Combo · Cleansed Curse · Electricity · Bioelectric Surge · Nature · Blossom · Pheromones · Sorcery · Rejuvenate · Water · Soothing Mist · High Tide| Power Set | Power | Special Effect |
|---|---|---|
| Celestial | Renew | Can Combo into Cleansed Curse |
| Electricity | Bioelectric Surge | |
| Nature | Blossom | Restores additional health when used on allies with Pheromones |
| Sorcery | Rejuvenate | |
| Water | Soothing Mist | Restores additional health while High Tide is active |
Group Shield Powers
- Each Healer Power set has a Group Shield that prevents incoming damage for the 3 most injured group members.
- Healer Group Shields prevent damage equal to 125% Restoration or 3 opponent attacks.
- These shields also provide a small Heal while using the Regenerative Shielding Hands Equipment Mod.
Related article links (1)
Regenerative ShieldingGroup Shield Powers
Related article links (12)
Celestial · Blessing · Combo · Cleansed Death Mark · Electricity · Flux · Nature · Swarm Shield · Sorcery · Boon of Souls · Water · Bubble| Power Set | Power | Special Effect |
|---|---|---|
| Celestial | Blessing | Can Combo into Cleansed Death Mark |
| Electricity | Flux | May repel opponents |
| Nature | Swarm Shield | |
| Sorcery | Boon of Souls | |
| Water | Bubble |
NPC Healing Powers
- Each Healer Power set has powers that Heal Non-Player characters including player Pets.
- Most NPC Heals require the Healer to be close to a Non-Player character for the healing effect.
Related article links (1)
PetsNPC Healing Powers
Related article links (19)
Celestial · Consume Soul · Virtuous Light · Cursed Idol · Sacrifice · Electricity · Galvanize · Arc Lightning · Electrogenesis · Nature · Cross Pollination · Bloom · Sorcery · Circle of Protection · Soul Well · Shard of Life · Soul Bolt · Water · Solace of the Sea| Power Set | Powers |
|---|---|
| Celestial | Consume Soul, Virtuous Light, Cursed Idol, Sacrifice |
| Electricity | Galvanize, Arc Lightning, Electrogenesis |
| Nature | Cross Pollination, Bloom |
| Sorcery | Circle of Protection, Soul Well, Shard of Life, Soul Bolt |
| Water | Solace of the Sea |
Supercharge that restores Health
- Each Healer power set has a Supercharge that restores Health to group members. Castor's Watch enhances supercharge.
Related article links (1)
Castor's WatchSupercharge that restores Health
Related article links (12)
Celestial · Sacrifice · Electricity · Invigorate · Group Transducer · Nature · Regeneration · Sorcery · Transcendence · Water · Tranquil Pool · High Tide| Power Set | Power | Special Effect |
|---|---|---|
| Celestial | Sacrifice | Shields group members. Taunts nearby opponents. |
| Electricity | Invigorate | |
| Electricity | Group Transducer | Shields group members |
| Nature | Regeneration | |
| Sorcery | Transcendence | Shields group members |
| Water | Tranquil Pool | Shields group members if High Tide is active |
Full Range Group Heals
- Each Healer power set has a full range Heal that affects up to 7 group members.
- These powers have a long cast time and may be interrupted.
- Empowered Channeling or Kryptonian Channeling [Passive Ability] can be used to uninterrupt the use of these powers.

Full Range Group Heals
Related article links (9)
Celestial · Guardian's Light · Electricity · Ionic Drain · Nature · Bloom · Pheromones · Sorcery · Invocation of Renewal| Power Set | Power | Special Effect |
|---|---|---|
| Celestial | Guardian's Light | May push back nearby opponents. |
| Electricity | Ionic Drain | Damages target over time. |
| Nature | Bloom | Releases Pheromones for for healing over time. May push back nearby opponents. Heals nearby NPCs. |
| Sorcery | Invocation of Renewal | Group members under 50% health are healed more. |
Nature Healing
- See Also: List of Nature Powers
- Nature has four powers that release Pheromones in Healer role in addition to the primary Heal produced by each of those powers.
- Flourish and Blossom will produce a large Burst heal based on the number of existing Pheromone stacks.
- A Nature Healing Stacker attempts to maintain multiple Pheromone stacks to provide small Heals Over Time along with the primary Heal of each individual power.
- A Nature Healing Burster typically uses two Pheromone producing powers to setup Blossom or Flourish for a larger Burst Heal.
Useful Nature Healing Powers
- Blossom : Priority Heal that restores Health to you and the most injured group member plus it restores additional health when used on allies with Pheromones.
- Cross Pollination : Wave effect that Heals up to 4 nearby allies that then may echo Heal up to 8 allies near the originally affected allies. Also establishes Pheromones. Heals NPCs including player pets.
- Savage Growth : Restores Healing to nearby allies and establishes Pheromones.
- Flourish : Restores Health to group members based on the number of existing Pheromone stacks. Spreads and refreshes Pheromones on allies.
- Bloom : Produces a large Heal to group members after a cast time and establishes Pheromones.
- Metabolism : Restores Health establishes Pheromones.
- Swarm Shield : Shield that Prevents Damage for yourself and the three most injured group members.
- Regeneration : Supercharge that regenerates Health over time for group members.
- Roar : Pheromones are consumed and allies receive the remaining healing at once.

Related article links (12)
Blossom · Pheromones · Cross Pollination · pets · Savage Growth · Flourish · Pheromone · Bloom · Metabolism · Swarm Shield · Regeneration · RoarSorcery Healing
- See Also: List of Sorcery Powers
- Sorcery has several powers that only restore Health in the Healer role including Circle of Protection, Soul Well, Shard of Life, Soul Bolt, Soul Siphon, Transmutation and Summon Watcher.
Related article links (8)
List of Sorcery Powers · Circle of Protection · Soul Well · Shard of Life · Soul Bolt · Soul Siphon · Transmutation · Summon WatcherUseful Sorcery Healing Powers
- Circle of Protection : Restores Health to allies that pass through the field.
- Rejuvenate : Priority Heal that restores Health to yourself and the most injured group member.
- Boon of Souls : Shield that Prevents Damage for yourself and the three most injured group members.
- Summon Watcher : Pet that restores Health to group members.
- Ritualistic Word : Restores Health to yourself and 3 group members. Restores Power over Time to a summoned Watcher.
- Invocation of Renewal : Produces healing ticks followed by a burst heal. Group members under 50% health are healed quicker.
- Soul Siphon : Restores Health to yourself and nearby allies.
- Soul Well : Produces Healing ticks that affect allies within the field. Heals NPCs including player pets.
- Shard of Life : Heals allies near your target.
- Soul Bolt : Heals allies near your target.
- Transmutation : Heals allies near your target.
- Transcendence : Supercharge that regenerates Health over time for group members.
- Arbiter of Destiny : Supercharge transformation that provides unlimited power to cast active powers.


Related article links (15)
Circle of Protection · Rejuvenate · Boon of Souls · Summon Watcher · Ritualistic Word · Watcher · Invocation of Renewal · Soul Siphon · Soul Well · pets · Shard of Life · Soul Bolt · Transmutation · Transcendence · Arbiter of DestinyElectricity Healing
- See Also: List of Electricity Powers
- Bio-Capacitor places a Bio-Charge on group members that activates if Health falls below 45% within 30 seconds.
- Electrogenesis applies an Aura to the caster and one ally that provides Heals to other nearby allies while the Aura is active.
Useful Electricity Healing Powers
- Bioelectric Surge : Priority Heal that restores Health to yourself and the most injured group member.
- Electrogenesis : Creates Auras on the caster and the closest group member that provide Heals to other nearby allies.
- Flux : Shield that Prevents Damage for yourself and 3 group members.
- Bio-Capacitor : Restores Health to yourself and the 7 most injured group members. Places a Bio-Charge on group members that activates if Health falls below 45% within 30 seconds.
- Recover : Restores Health for you and up to 3 group members.
- Galvanize : Wave effect that Heals up to 4 nearby allies that then may echo Heal up to 8 allies near the originally affected allies. Heals NPCs including player pets.
- Arc Lightning : Bolt that may jump to and heal multiple allies.
- Electroburst : Heals you and up to 7 nearby group members.
- Ionic Drain : Produces healing ticks followed by a large burst heal.
- Group Transducer : Supercharge Shield that Prevents Damage for yourself and 7 group members and restores Health over time.
- Invigorate : Supercharge that restores Health over time to you and your group members.


Related article links (13)
Bioelectric Surge · Electrogenesis · Flux · Bio-Capacitor · Bio-Charge · Recover · Galvanize · pets · Arc Lightning · Electroburst · Ionic Drain · Group Transducer · InvigorateCelestial Healing
- See Also: List of Celestial Powers
- Some Celestial powers can combo into another power to provide additional healing.
- Cleansed Malediction and Corrupted Benediction will heal group members based on the damage dealt.
- Cleansed Curse and Cleansed Death Mark will heal group members when the affected targets are knocked out.
Related article links (6)
List of Celestial Powers · combo · Cleansed Malediction · Corrupted Benediction · Cleansed Curse · Cleansed Death MarkUseful Celestial Healing Powers
- Renew : Priority Heal that restores Health to yourself and the most injured group member.; Combos into Cleansed Curse that Heals when your target is knocked out.
- Blessing : Shield that Prevents Damage for yourself and 3 group members.; Combos into Cleansed Death Mark which restores health to you and 3 group members.
- Guardian's Light : Restores Health to you and seven group members.
- Admonish : Restores Health to yourself and three group members.; Combos into Cleansed Blight which restores Health Over Time to 7 group members.
- Renew : Restores Health to yourself and the most injured group member.; Combos into Cleansed Curse that Heals when your target is knocked out.
- Virtuous Light : Creates glyphs that Heal allies and Purifies enemies.
- Consume Soul : Restores Health Over Time to nearby allies. Heals NPCs including player pets.
- Benediction : Combos into Cleansed Malediction which heals seven group members based on the damage dealt.
- Consecrated Ground : Supercharge that Prevents most Damage while in the area of effect.
- Sacrifice : Supercharge that provides Health and Damage Prevention to allies while Taunting nearby enemies to attack you with additional Healing Over Time if you are knocked out.
- Life Drain : Supercharge that damages enemies while restoring Health to group members.
- Wrath of the Presence : Combos into Cleansed Consume Soul which restores Health to allies.
- Blight : Combos into Corrupted Admonish which restores Health to you and three nearby group members.
- Curse : Combos into Corrupted Renew that Heals you and the most injured group member.
- Malediction : Combos into Corrupted Benediction which heals seven group members based on the damage dealt.


Related article links (24)
Renew · Cleansed Curse · Blessing · Cleansed Death Mark · Guardian's Light · Admonish · Cleansed Blight · Virtuous Light · Purifies · Consume Soul · pets · Benediction · Cleansed Malediction · Consecrated Ground · Sacrifice · Life Drain · Wrath of the Presence · Cleansed Consume Soul · Blight · Corrupted Admonish · Curse · Corrupted Renew · Malediction · Corrupted BenedictionWater Healing
- See Also: List of Water Powers
- Healing is increased for Blessing of the Depths, Mending Wave, Soothing Mist, Tempest Guard and Tranquil Pool while High Tide is active.
Related article links (7)
List of Water Powers · Blessing of the Depths · Mending Wave · Soothing Mist · Tempest Guard · Tranquil Pool · High TideUseful Water Healing Powers
- Soothing Mist : Priority Heal that restores Health to yourself and the most injured group member.
- Bubble : Shield that Prevents Damage for yourself and 3 group members.
- Tempest Guard : Shield that Prevents Damage for yourself and 7 group members.
- High Tide : Increases the potency of most Water healing abilities.
- Blessing of the Depths : Heals group members.
- Mending Wave : Heals yourself and 3 group members.
- Tsunami Strikes : Combo power that heals the most injured group member.
- Solace of the Sea : Heals allies over time including NPCs and player pets.
- Tranquil Pool : Supercharge that heals group Members over time.
- Flood of Power : Supercharge that grants Power and reduces power cooldowns.
Related article links (12)
Soothing Mist · Bubble · Tempest Guard · High Tide · Water · Blessing of the Depths · Mending Wave · Tsunami Strikes · Solace of the Sea · pets · Tranquil Pool · Flood of PowerEquipment Mods
- Placing Equipment Mods in slots can boost stats and improve performance.
- Color Mods should match a socket color to gain bonus affinity stats.
- White Equipment Mods require Lair System access.
Equipment Mods
Related article links (10)
Weapon Slot · Neck Slot · Back White Slot · Breakout Regeneration · Feet White Slot · Ultimate Tumbling Master Mod · Chest White Slot · Quick Healing · Hands White Slot · Regenerative Shielding| Slot | Mod |
|---|---|
| Blue Slots | Restoration & Health |
| Yellow Slots | Restoration or Restoration & Power |
| Red Slots | Restoration & Precision or Restoration & Might |
| Weapon Slot | Restorative Adapter or Absorption Adapter |
| Neck Slot | Focused Restoration |
| Back White Slot | Breakout Regeneration |
| Feet White Slot | Tumbling Master, Explosive Block or Ultimate Tumbling Master Mod |
| Chest White Slot | Quick Healing |
| Hands White Slot | Regenerative Shielding |
Buffs
- Some healing powers can buff the group.






Single Target Burst Heals
- This ability heals yourself and your most injured group member. All healing powers have this ability. It is mainly used if one member in the group has low health or in emergency situations.
- Blossom : Nature : Flora
- Renew : Celestial : Blessed
- Bioelectric Surge : Electricity : Voltage
- Rejuvenate : Sorcery : Destiny
Power Management
- Most abilities actively require Power in order to use them. All alone, you will likely have enough power to use at most 6-7 skills before you empty out. If you don't have an ability to heal, you can always use a Green Barrels (Health). They are often found around bosses in small group content. Also, Omegahedron, Task Manager [Passive Ability] and Passive Ability - All Your Base restores power.
- In order to acquire more Power there are several options:
Related article links (5)
Power · Green Barrels (Health) · Omegahedron · Task Manager [Passive Ability] · Passive Ability - All Your BaseDrinking Soda
- This costs cash but it allows you to regain a significant amount of power in short order. It is a great option in emergencies. Recommended to use Bottled City Soder.
Group with a Controller
- Controllers have innate abilities that will restore power to you or to your group. They won't give you infinite power, but it should be more than enough to keep full if the group is paying attention.
Build your Combo Hit Meter
- The higher your Combo Hit Meter, the faster you will regenerate Power. Recommended to use Replenishing Adapter V for additional power every 20 seconds.
- Some of the better normal Weapon combos to increase your Combo Hit Meter:
- Rifle's Surprise Volley - Tier 4 in 11 seconds
- Hand Blaster's Pulse Beam - Tier 4 in 12 seconds
- Dual Pistol's Jump Shot - Tier 4 in 14 seconds
- Some Weapon Mastery combos increase your Combo Hit Meter faster than most normal Weapon combos:
- Brawling into Martial Arts' Shuriken Storm - Tier 4 in 6 seconds
- Two-Handed into Bow's Arrow Storm - Tier 4 in 13 seconds
Related article links (8)
Replenishing Adapter V · Rifle · Hand Blaster · Dual Pistol · Brawling · Martial Arts · Two-Handed · BowStrategy
- Healers should always watch their teammates health bars. When a teammates health falls below 75%, it's time to heal them. A healer should always keep their teammates health over 75% because certain enemies can do major burst damage. Healers need to stay at the back of the group because they are the weakest of the 4 roles. The general strategy of this is that Healers should be at the back, Controllers should be next, DPS should be the second closest to the enemy and Tanks should be the closest and taking the enemies attacks. It is also said that a healer should avoid Damaging enemies, move around or jump a lot in a hard Raid or Alert so the enemy loses interest and misses them.
Leveling a Healer
- You have two main options when leveling, either solo or group play. A healer can solo play easily as a DPS with some healing skills, though you will need to respec once you approach level 30, in order to re-distribute your skills. Up until that respec, select any abilities you wish and the weapon style you enjoy the most.
- Real group play doesn't start until level 9 and your first alert. Waiting until level 10 and acquiring your healer role is a better option. At this point, you will level solely in Alerts until level 30 and having a plan for your skills will save you a respec later on in levels. This will mean point hoarding until you reach the appropriate level to spend them and a lack of DPS ability. This can hinder you during the time you are waiting to enter an instance but is quite manageable. Once in the group play, make sure you are in the Healer stance (default T button to switch).
- PvP play is another option that is available to level. It requires a more defensive play style and situational awareness. You never want to be alone, so you will find yourself typically following 1-2 other players around on the map. Staying close to melee range means you are a less vulnerable target.
Related article links (1)
respecNature Strategy
- It is preferable if the player is always in Insectoid Form due to it granting extra Critical healing chance and magnitude percentages unless you need to deal more damage or the player is over geared for the mission. While in Insectoid Form, Hive Mind restores Power for each Pheromone effect applied, whenever Blossom removes Pheromone effects and when activating Swarm Shield. While Hive Mind is active, the damage caused by Acid Spit, Fury and Launching Uppercut is increased significantly, and Fury also hits additional enemies in an area surrounding your target. Blossom is your basic heal to top a single target. Cross Pollination is best used when the group is close together; too spread out and you lose a lot of healing power but can share the same pheromone stack with Bloom. Metabolism is a good group heal that should be used frequently, when you have over 80% power. Use Swarm Shield when your group is taking a lot of damage, which makes it easy for you to heal them up. Harvest is very useful for a secondary burst healing power, yet it requires each Pheromone for additional healing ( Which is same as Blossom except it doesn't remove the pheromones.) Hive Mind should be used in conjunction with another group skill, such as Metabolism to quickly heal the group or Regeneration (requires 50% Supercharge) to quickly boost everyone's health and power.
Electricity Strategy
- This healer power focuses on burst heals. Electric healers are power hungry but their burst heals are worth it. A very huge benefit of this power is its safety net ability. This ability (Bio-Capacitor) should remain active all the time. If the electric healer is struggling to keep the group alive the safety net will automatically heal the team member if their health falls below 35%.The safety net ability has a 2 minute time span but it can be used as a single target burst heal so the ability can remain active all the time. Electric healers only have one buff, but an advantage of this power is that it is the fastest power to heal due to it specializing in burst healing.
Sorcery Strategy
- Rejuvenate is the basic heal to top off members. Circle of Destiny should always be used when the group is going to be standing still for more than 10 seconds and on every boss. Be sure to be standing in range as well to get the healing effects. Invocation of Renewal takes a while to cast and is best used when the entire group is in range of you. Arbiter of Destiny is a Super Charge and allows you to spam your healing spells for a short period. The Summoned Watcher is fragile but heals for good amounts, so using it with Offering is advisable for it to have power to heal and place the pet higher on the enemy's hate list. Summon Soul Well combined with Circle of Destiny gives out a ton of healing for little power but requires everyone to be in range. Ritualistic Word is a new ability that arrived in a patch after GU34 and heals 3 group members and also provides health and power over time to the Watcher. Sorcery healers are in a sense Controllers for pets and NPC's due to the ability Offering. This ability does not heal but provides a shield on the players pet and provides power over time to it and NPC's. Boon of Souls is a group shielding and puts a shield on the player and four allies. Shard of life forms a crystal that falls from the sky landing on the enemy and healing near by allies over time. Due to Sorcery having a lot of healing abilities, there are many possible loadouts.
Celestial Strategy
- Celestial healers are classified as aggressive healers (Also known as Battle Healers) due to their ability to do more damage with combos and use more offense in battle. Unlike other healers, Celestial healers have a greater advantage in damage in both PvP and PvE missions and it is sometimes preferred in PvP that these healers remain in the middle of the battle rather than out like the other 3 healing powers. Even though this healing power does better and more damage, this does not make it the best healing power. This class specializes in healing over time like nature. Celestial healers should always make sure their healing ticks are active. Admonish + (Combo) and Consume Soul are the best for healing over time. These two abilities have around a 5 second time span, so players should activate these abilities every 5 seconds to remain accurate and not wasting power. Celestial also has burst heals but these are mainly activated in emergency situations. The shield ability Blessing should remain activated all the time since this helps the player and 3 other team mates. Celestial healers have a choice of 3 different damage buffs , (Benediction, Malediction + (Combo) and Anoint). These buffs are preferably used in Alerts, Duos, Challenges and PvP but are not recommended for Hard Raids unless there are two healers.
Group Target Heals
- These work very similar to single target heals. Rarely will you hit everyone that is in range due to line of sight, so it's best if the group is aware that they need to stick close together and not roll away when in dire need of a heal.
Weapon Choice
- It is suggested you use a ranged weapon because you don't want to be in the main fight, but you want to be close to it so you can support your allies.
Shielding Group Members
- Shielding your group members can be really useful, especially when taking too much damage from enemies, also it may help you heal up your group members that have been damage more often, even making the teamwork go smoother.
Gallery





See also
- Healer Weapon
- Healer Costume
- Healer Item